Description
- Resilient Sounds V2 Gold Series 10 Subwoofer Heavy-duty 10 sub built for high-output systems
- 1500W RMS Power Rating Conservatively rated for serious daily or competition-level use
- 3 4-Layer Voice Coil Extended for increased thermal handling (25% longer than V1)
- Triple Stack 220mm Motor Vented and 15% larger than V1 for stronger motor force and cooling
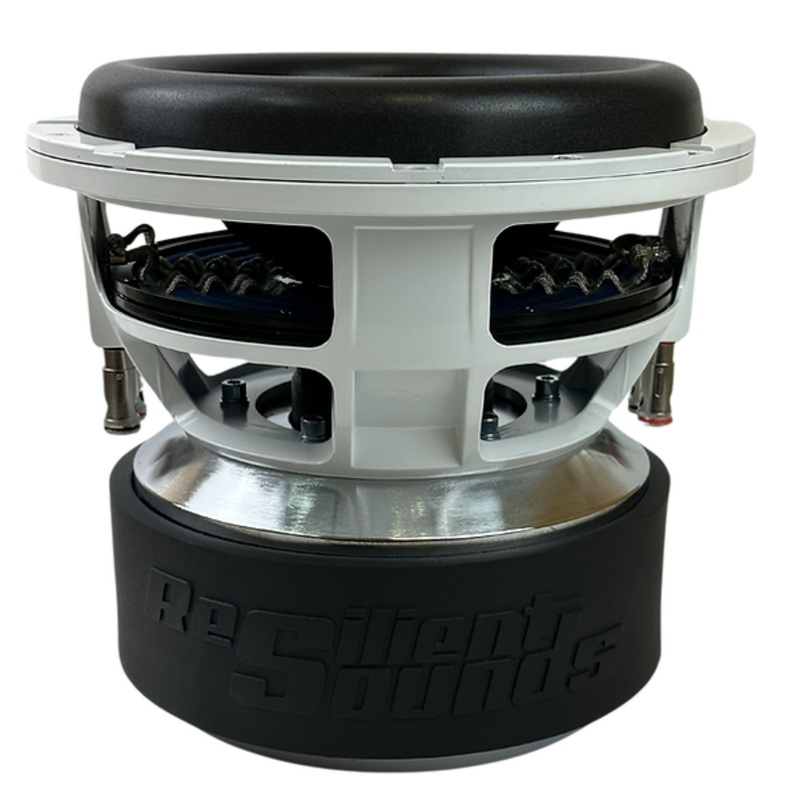
Resilient Sounds V2 Gold Series 10″ Dual 2 Ohm 1500 Watt RMS Subwoofer
This Listing Includes:
- (1) Resilient Sounds V2 Gold Series 10″ Dual 2 Ohm 1500 Watt RMS Subwoofer
Features:
- 3″ 4 Layer Voice Coil (25% longer than V1)
- 8.5″ Spider Pack with Dual Sewn Leads
- NEW High Roll Tooled Surround
- Triple Stack 220mm Motor with Venting (15% larger than V1)
- Aluminum Shorting Ring
- Cast Aluminum Frame
- Aluminum Gasket
- 4 Ga Push Terminals
- Engraved Bottom Plate
- Molded Motor Boot
- Conservatively Rated 1500 Watts RMS
- XMAX 31MM
- Dual 2 Ohm
- Size: 10″
- For mounting Resilient Sounds V2 models with trim rings, we recommend a hex head screw that avoids flaring to prevent cracking the trim ring.
Enclosure Specs:
- CUBIC FT: 1.25-2 CUBIC FT PER SUBWOOFER
- TUNING: 28-32HERTZ
- PORT AREA: 12-16 SQ INCHES OF PORT AREA PER CUBIC FT
- MOUNTING DEPTH: 8.25 INCHES
- CUTOUT: 9.25 INCHES
- DISPLACEMENT:0.17 CU FT
- OUTSIDE DIAMETER:10 23/32 INCHES
Trim Ring Removal Instructions
The Resilient Sounds V2 trim ring is a decorative and functional piece used to enhance aesthetics and secure the surround. Please note it is not meant to be removed unless doing a recone and doing so may void your manufacturer warranty. However, should you choose to remove it here is the process and tools you will need.
- Phillips Screwdriver
- Pliers
- Heat Gun
- Pry Tool
- Personal Protective Equipment (PPE)
- You will need a phillips screwdriver to remove the 4 screws securing the trim ring to the frame. There may be residual adhesive on the screws preventing them from coming all the way out and you may need pliers once unscrewed to free the screws.
- There may be excess adhesive protruding from the surround that may have adhered to your trim ring. So next you will utilize a heat gun going around the trim ring with a pry tool slightly breaking the adhesive free. The Frame and Trim Ring will be hot! USE CAUTION! Be sure to use a tool that won’t damage your trim ring or frame and do not pry too much at once as you may break the ring.
- By this point your ring should be free from the frame. Handle it with care as it may still be hot. When reinstalling the ring ONLY hand tighten the screws.


Reviews
There are no reviews yet.